Professional Car Waxing Tips
By John Linden

Do you love the look of a professionally waxed car but don’t want to foot the bill to hire a detailer? There are a variety of great tips that you can follow on your own, allowing you to achieve that beautiful, deep wax shine while sparing yourself the expense of a detailer. Maintain that shine and extend the benefits of your efforts by utilizing a car cover. Whether you keep your car outside or in a garage, a car cover can ensure that your car’s beautiful appearance lasts as long as possible.
Preparation: Temperature
Before you start waxing it is important that you begin the job in optimal weather conditions. If it is too hot out, your wax will dry too quickly, making it difficult to buff and even harder to remove once it has been applied. Likewise, wax is difficult to apply and work with when trying to use it during cold weather. For these reasons, it is preferable to apply wax at 55-85 degrees Fahrenheit.
Preparation: Use Soap for Cars & Treat Scratches
One of the most important steps in a successful, professional wax job is a well-prepared surface. Good preparation will ensure maximum shine and clarity while improving adhesion, so consider the following prep tips before your next wax:
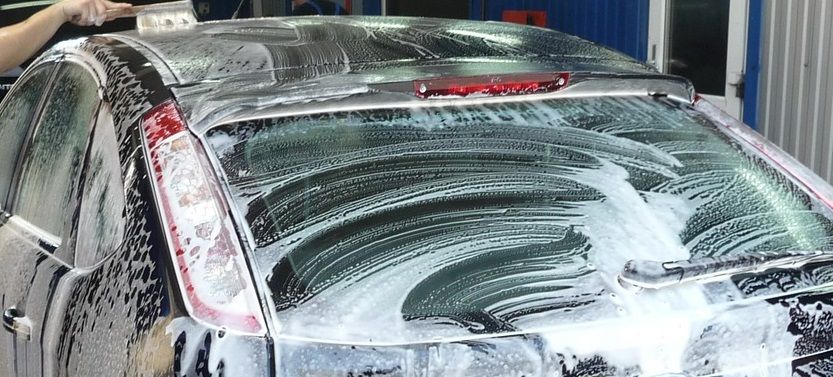
- Wash your car. It is important that your car is clean and completely dry before you try to apply wax. It will be difficult for wax to adhere to moisture and dirt, so it is essential that you are starting with a clean surface. Use a soap specifically made for washing cars. Avoid dish soap as it is designed for a specific purpose and can be harsh on your car’s finish while having an immediate drying affect.
- Treat scratches and damaged paint. If you noticed that your paint job is damaged, scratched, or dull, consider using a polishing or rubbing compound prior to waxing. These compounds are slightly abrasive, so that they can work to remove a fine clear coat layer from your vehicle to achieve even coloring. (To be certain your car is completely cleaned and prepped, place a plastic bag over your hand and gently run it along the car’s surfaces. If you feel any bumps, snags or rough areas, go back and address those spots before you begin waxing).
- Find a good location. Ideally, you should be waxing your car in a garage and out of the direct sunlight. This will prevent the sun from interfering with the wax.
Applying Layers: Less is More
When it comes to properly applying wax to your vehicle, it is important to remember the concept of layering. One of the most common mistakes that people make when it comes to wax application is to put on too much at once. This error can be difficult to remove and will lead to product waste. Using a thin application will actually work to bond to the paint better, so use a small amount and buff until you can hardly see it.
While a thin coat is best, that doesn’t mean that you have to be satisfied with one coat. If you want more shine and gloss, go ahead and add multiple coats. The most common technique to wax layering is to apply a thin coat, give it time to cure, buff off any excess, and then repeat. However, if you are short on time, skip the buffing and just apply a second coat over the top of the first cured coat. Then allow it to cure and buff.
Use the Right Tools: Application & Buffing
Having the right tools can make your wax job faster and easier to complete, leaving you with a more attractive outcome. For these reasons, it is important that you get a few things together before you start your job.
Application Sponges
Most car waxes will come with an applicator, but it may not be in your best interest to use this standard foam pad. Poly foam wax applicators tend to achieve the best result when it comes to getting a thin and even coat. They are absorbent and durable, and best of all they can be washed, allowing you to use them again. These applicators are also inexpensive, so if they are getting soiled, don’t be afraid to toss them out.
Microfiber Towels
Leave the old cotton t-shirts and cloth diapers for other household duties. As soft as they may seem to be, they have abrasive fibers that will potentially leave scratches in your clear-coat finish –defeating all your detailed effort. Microfiber towels are one of the best options for buffing after wax application, as microfiber is non-abrasive, lint-free, and effective at lifting dirt rather than just pushing it around. Microfiber wax removal cloths are great options for buffing excess sealant or wax from your painted surfaces after you have applied the wax. Polish removal cloths can be used to remove excess product or polish-containing product. Don’t forget to use separate towels for specialized jobs, such as a glass cleaning cloth for interior and exterior glass surfaces and an interior cloth to wipe down and clean leather, carpet, plastic, cloth, and vinyl.
Wax Removal Tips
Periodically, it is important to remove old car wax before reapplying a new coat. The previous wax could streak or the paint job may begin to look dull, both of which are signs that it is time to reapply. As a general rule, remove old car wax every three months, but this should be done more frequently if your vehicle is often exposed to harsh outdoor weather conditions.
There are two primary ways that you can remove old wax from your car:
- Use a Spray-On Pre-Wax Cleaner. Start with a car that has been freshly washed and dried, spray on the pre-wax cleaner, and then move on to the wax-remover. Be sure to also apply an all-purpose cleaner to a rag in order to clean the trim.
- Use Detailing Clay. You can also remove old wax from your car with detailing clay. To start, wash and dry your car, spray a clay lubricant onto your vehicle, and then work the clay bar over your car in small increments. The clay should pick up both wax and contaminants, and you can clean up the area with a microfiber towel when complete.
Extend the Life of Your Shine: Use a Car Cover
Using a car cover after waxing is important whether your car is stored outside or in a garage and will extend the life of that hard-earned shine you just put on. A custom car cover will keep dust off of the finish and out of filters and vents. Make sure that the wax has had a chance to cure completely before you put the cover on and consider disposable car covers as a lightweight and portable way to protect your prized possession. If you want added protection for more than just the new showroom shine, perhaps the use of a locking car cover is best as it provides an extra level protection and serves well as a deterrent to would-be thieves or even those that are just simply a little too curious.
Updated